
Top Tips for Wiring Accessory Lights on Your Truck or Trailer for Maximum Longevity
- fryejs91
- Jan 21
- 3 min read

Adding accessory lights to your truck or trailer can improve safety and visibility, especially during night driving or adverse weather. However, improper wiring can lead to frequent failures, corrosion, or electrical shorts that shorten the lifespan of your lighting system. To ensure your accessory lights last as long as possible, it’s essential to follow best practices when wiring them. This guide shares practical tips to help you wire your lights for durability and reliable performance.

Choose Quality Wiring and Components
The foundation of a long-lasting lighting system starts with the materials you use. Select wiring rated for automotive or trailer use, which is designed to withstand vibration, moisture, and temperature changes. Look for:
Wire gauge appropriate for the current draw of your lights (usually 16-18 gauge for most accessory lights)
Corrosion-resistant connectors such as sealed butt connectors or waterproof quick disconnects
Heat-shrink tubing to protect connections from moisture and dirt
Fuse holders and fuses sized correctly to protect the circuit from overload
Using cheap or undersized wiring can cause voltage drops, overheating, and premature failure.
Plan Your Wiring Route Carefully
Before you start connecting wires, plan the path your wiring will follow. Avoid areas where wires could be pinched, rubbed, or exposed to excessive heat. Common safe routes include along the frame rails or inside existing wiring conduits.
Keep wires away from moving parts like suspension components or steering linkages
Avoid sharp edges by using grommets or protective loom tubing where wires pass through metal panels
Secure wires with zip ties or clamps every 12-18 inches to prevent sagging or chafing
A well-planned route reduces wear and tear on wires and prevents shorts caused by damaged insulation.
Use Proper Grounding Techniques
A solid ground connection is critical for accessory lights to function correctly and avoid flickering or dimming. Instead of grounding to rusty or painted surfaces, find a clean, bare metal spot on the vehicle chassis.
Sand the grounding point to bare metal before attaching the ground wire
Use a ring terminal and a self-tapping screw or bolt to secure the ground wire tightly
If possible, run a dedicated ground wire back to the battery negative terminal for the best results
Poor grounding can cause electrical noise and reduce the lifespan of bulbs and LEDs.

Protect Connections from Moisture and Dirt
Water intrusion is a common cause of wiring failure in accessory lights. Moisture can corrode connectors and cause shorts. To prevent this:
Use waterproof connectors or apply dielectric grease inside connectors before joining wires
Cover splices with heat-shrink tubing or self-fusing silicone tape for a watertight seal
Route wiring away from areas prone to standing water or mud splash
Regularly inspect connections for signs of corrosion or damage, especially after off-road trips or heavy rain.
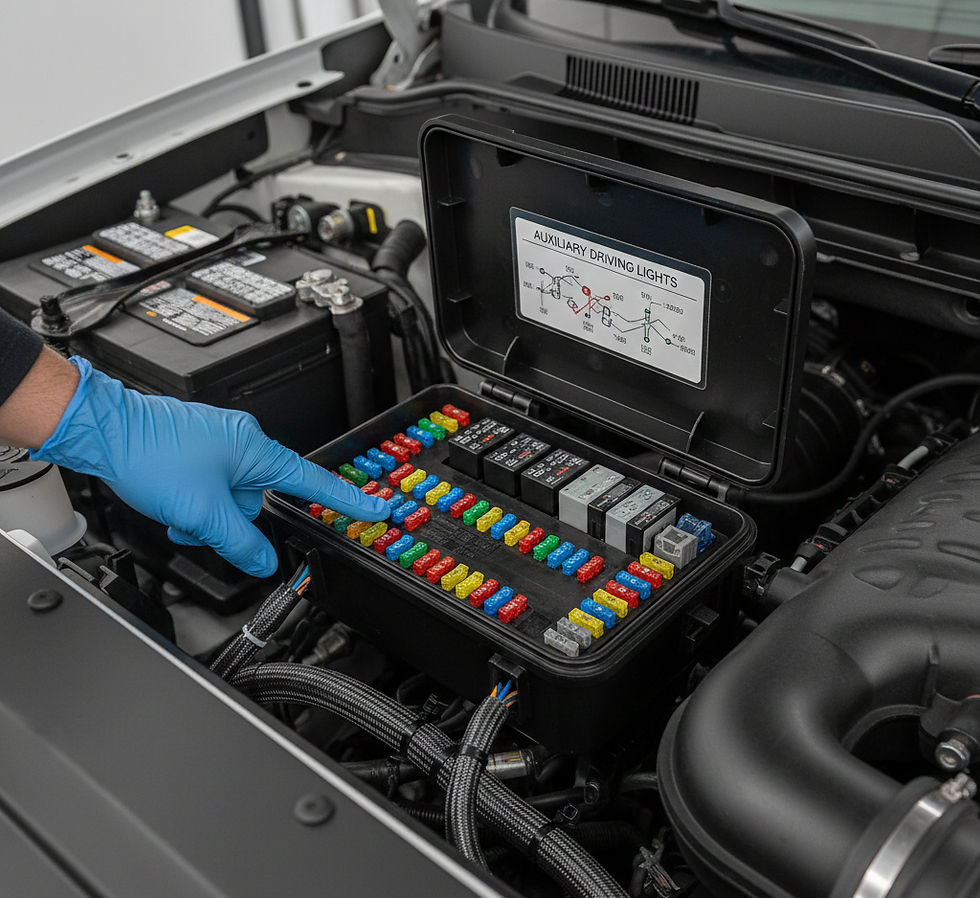
Install a Fuse Close to the Power Source
Every accessory light circuit should have a fuse installed as close as possible to the battery or power source. This protects your wiring and vehicle from damage if a short circuit occurs.
Choose a fuse rated slightly above the total current draw of your lights
Use an inline fuse holder that is easy to access for replacement
Label the fuse for quick identification
Without a fuse, a short could cause wiring to overheat and potentially start a fire.
Test Your Wiring Before Finalizing
Before securing everything permanently, test your wiring to ensure all lights work correctly. Check for:
Proper operation of each light (turn signals, brake lights, auxiliary lights)
No flickering or dimming when lights are on
Correct polarity on LED lights (they only work one way)
No blown fuses or tripped breakers
Use a multimeter to verify voltage at the light connectors and continuity in the wiring. Fix any issues before finalizing the installation.
Maintain Your Wiring System Regularly
Even the best wiring can degrade over time. Schedule regular inspections to catch problems early:
Look for cracked or brittle insulation
Check connectors for corrosion or looseness
Clean grounding points and re-tighten connections
Replace damaged wiring or connectors immediately
Routine maintenance extends the life of your accessory lights and prevents unexpected failures.


Comments